

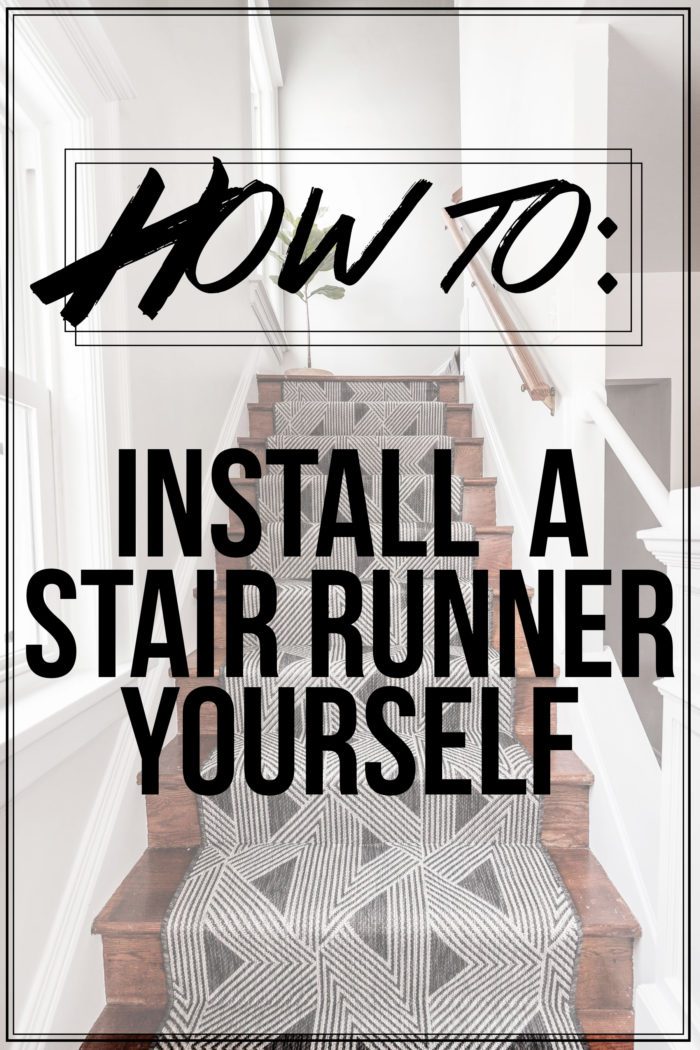
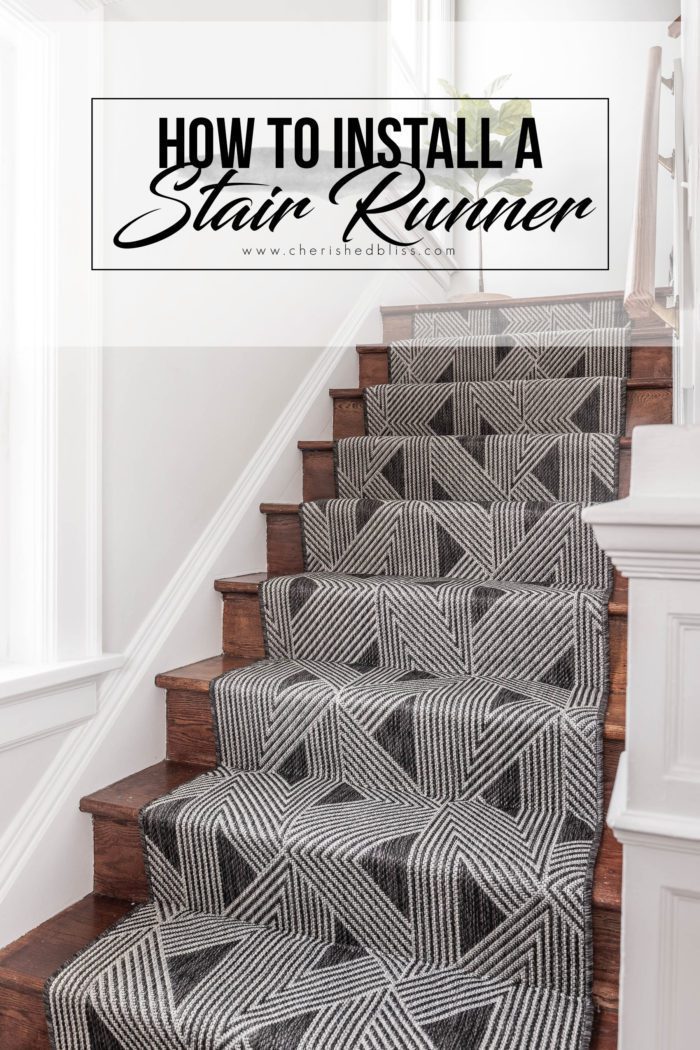
how to install stair runner
Add texture and a beautiful look to your stairs with a stair runner! How to Install a Stair Runner may seem complicated, but anyone can complete this DIY Project! This post contains affiliate links.
I've been powering through my entryway since the beginning of the year. Well… I take that back. We demo'd it last year and had a contractor come in and do some sheetrock work and framing to fix the ceiling. But since the beginning of the year I've been painting, installing trim, cleaning, caulking, more painting, etc. Well yesterday I tackled the stairs and installed our DIY Stair Runner! And today I'm here to share with you how to install a stair runner yourself! It's way easier than I expected. My knees may hurt… but it was so worth it!
Let's take a stroll down memory lane before I just jump in!
Here's what our entryway looked like when we first moved in! It was divided by a wall because this house was a duplex when we bought it. So if you merge those two photos and remove that middle wall that's essentially what we've done.
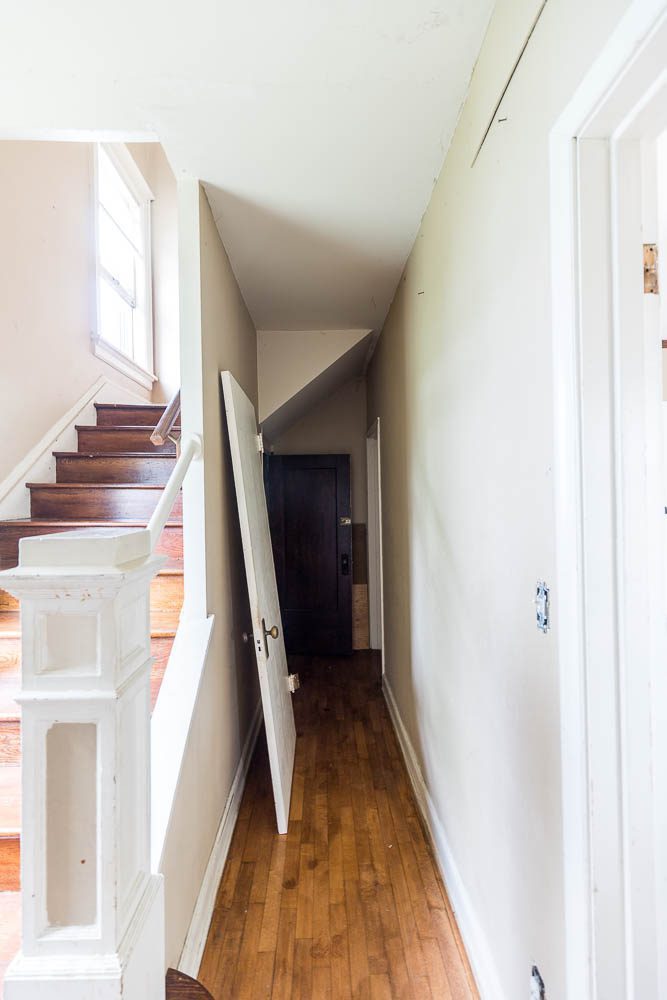

We also covered up that door on the right because it went into the master closet, but took away all the space for the rod. I'll never understand what some people do! Here's a good view of it when I was painting.
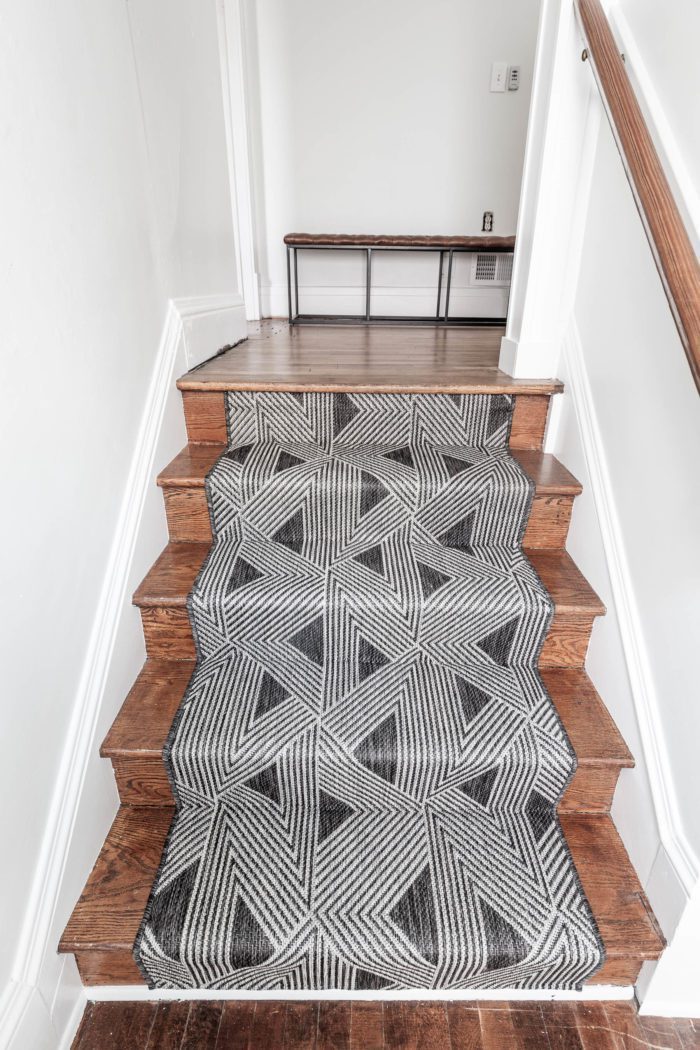
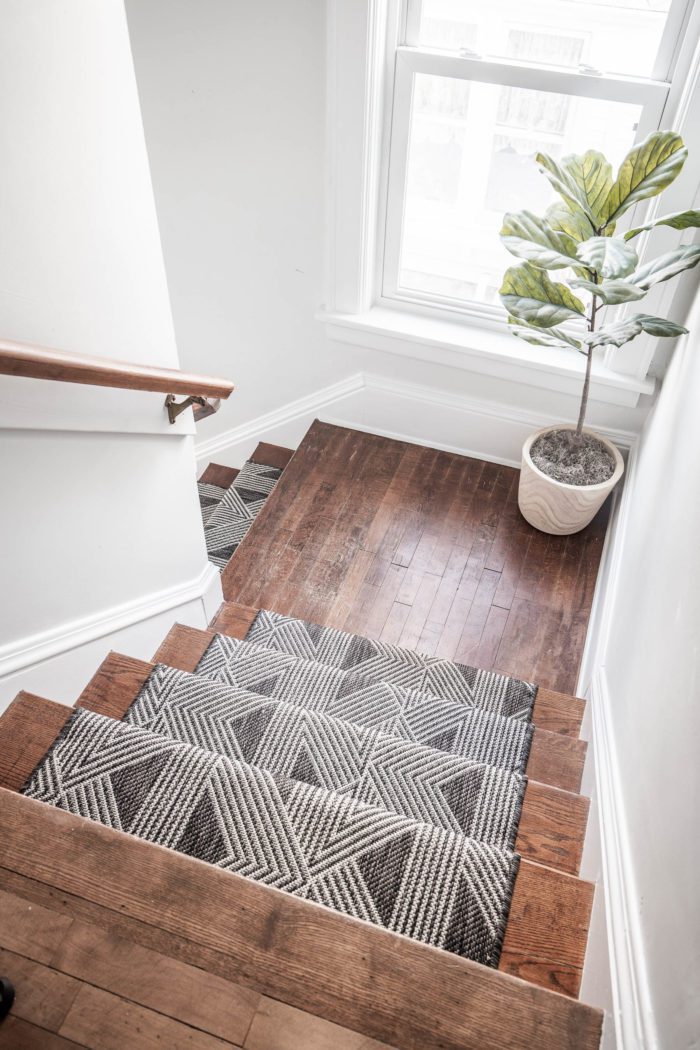
I'm still working on the whole entryway, but I have finished the DIY Stair Runner!
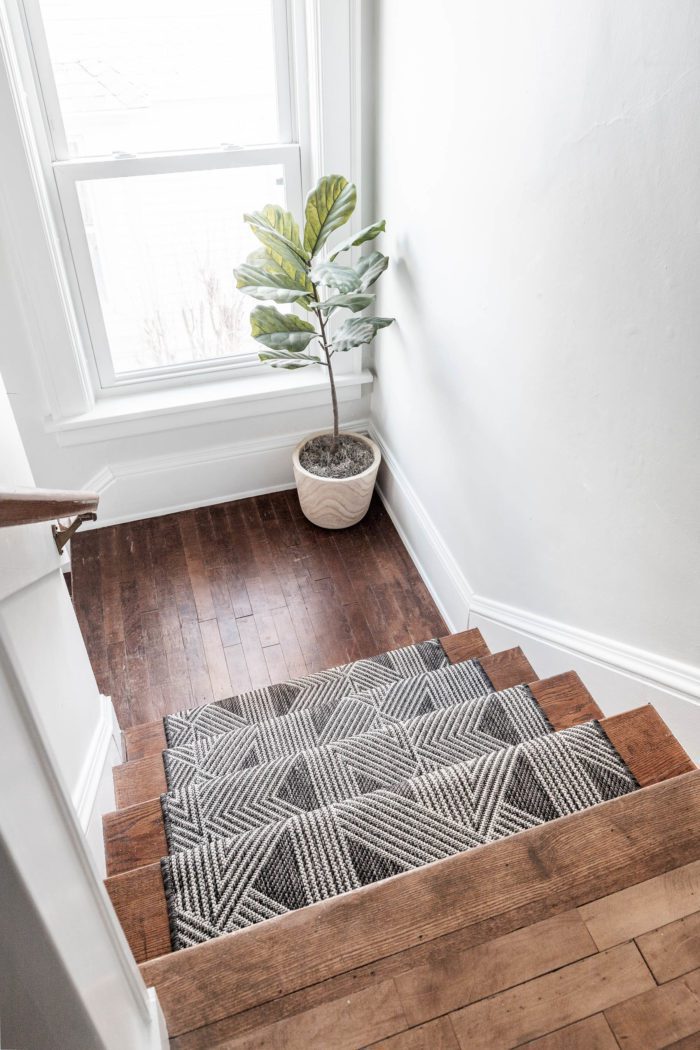
DIY Stair Runner Installation
This project is really simple and only took a few hours to install. I did it by myself, but there were definitely a few spots that would've been nice to have an extra pair of hands.

For this installation I used just regular runners that I purchased and pieced them together. You don't have to go buy a long piece of carpet. Doing it this way also opens up different options for the runner without spending a fortune!
Choosing the Right Runner for Your Stairs
Let's talk about picking out the actual runner! I've rounded up a few options for you below that I considered (including the one I chose).

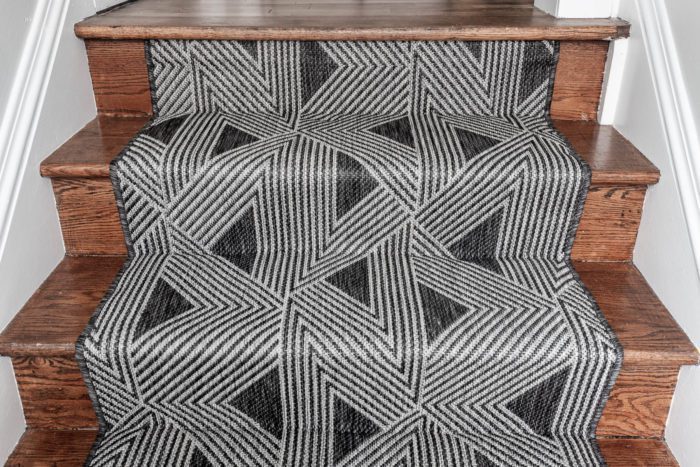
The main thing to consider when you purchasing runners is the pattern. Does it repeat and can it be matched up. Going with a bordered rug is possible, but you'd have a lot more scrap left over because of matching it up. I went with something where the pattern went all the way to the edge of the rug. This really made it easy when lining everything up!

Stair Runner Material
The next think to consider is the material. Stairs take a beating. Especially if you have kids and pets. I ultimately chose an indoor/outdoor rug made out of Polypropylene. Another popular choice for stairs is wool. Wool is pretty well known to be durable and is a great option if you feel like you can't find a pattern you like in an indoor/outdoor rug. I would definitely avoid cotton, it just won't withstand the constant up and down of feet and will be more difficult to clean in place.
Last but not least, consider your color options. I didn't want anything with a lot of light colors because I do in fact have kids and pets so it's bound to get a little dirty!
How to Install a Stair Runner Yourself
I shared this process on my IG stories, if watching the video is easier for you to understand. I saved it to my highlights so you can refer back if needed!
Supplies:
- Stair Runners (I used 4, but you will need to measure your stairs)
- Carpet Padding
- Fabric Scissors
- Crown Staple Gun
- 1/2″ Staples & 1″ Staples
- Carpet Tucker
- Pencil
- Tape Measure
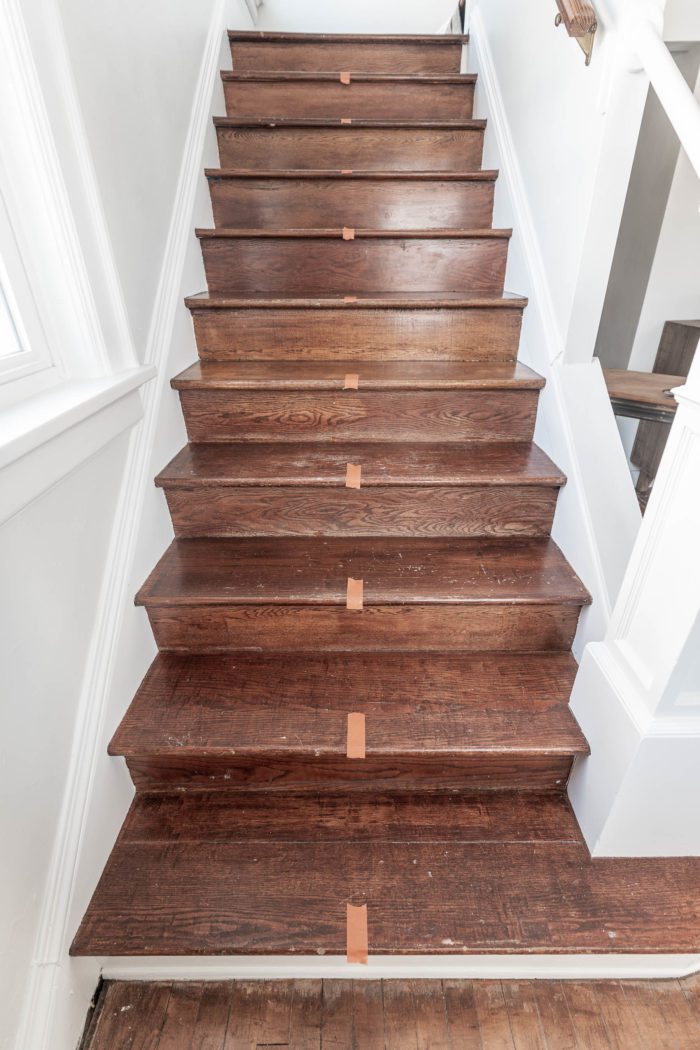
Clean Wooden Stairs
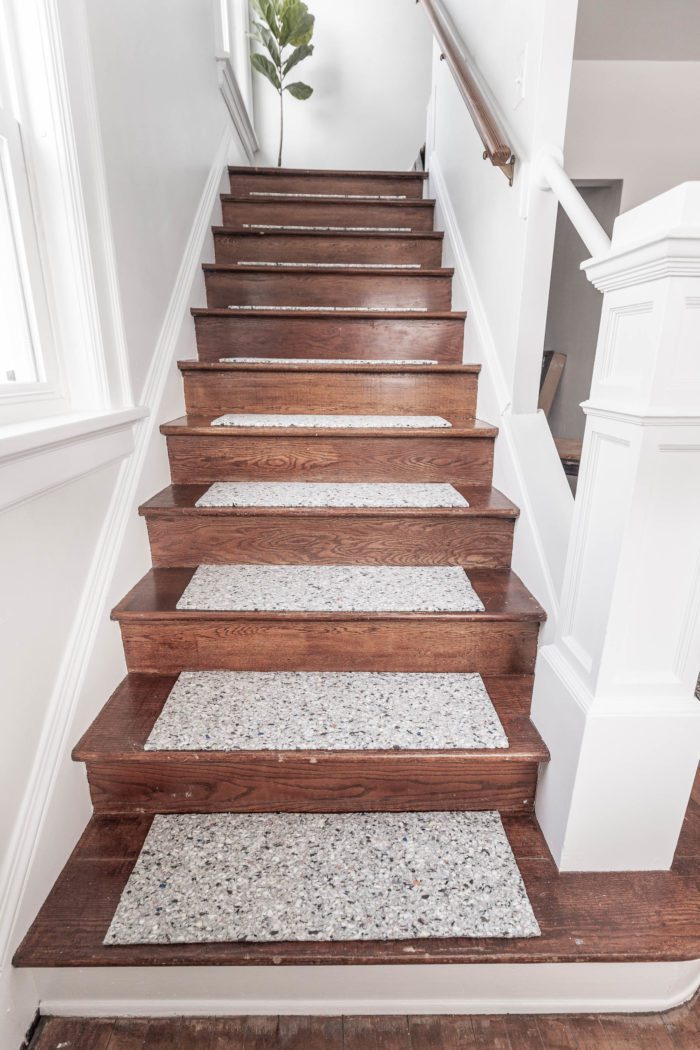
Before you begin installing the stair runner, the very first thing you need to do is clean your stairs. If you follow me on Instagram, you know that I went back and forth on preparing my stairs. Here are a few options: paint the treads and risers, paint just the risers, refinish the wood, or install the runner over the stairs as is. I decided to leave my steps as is. The most wear was in the middle where the rug would cover.
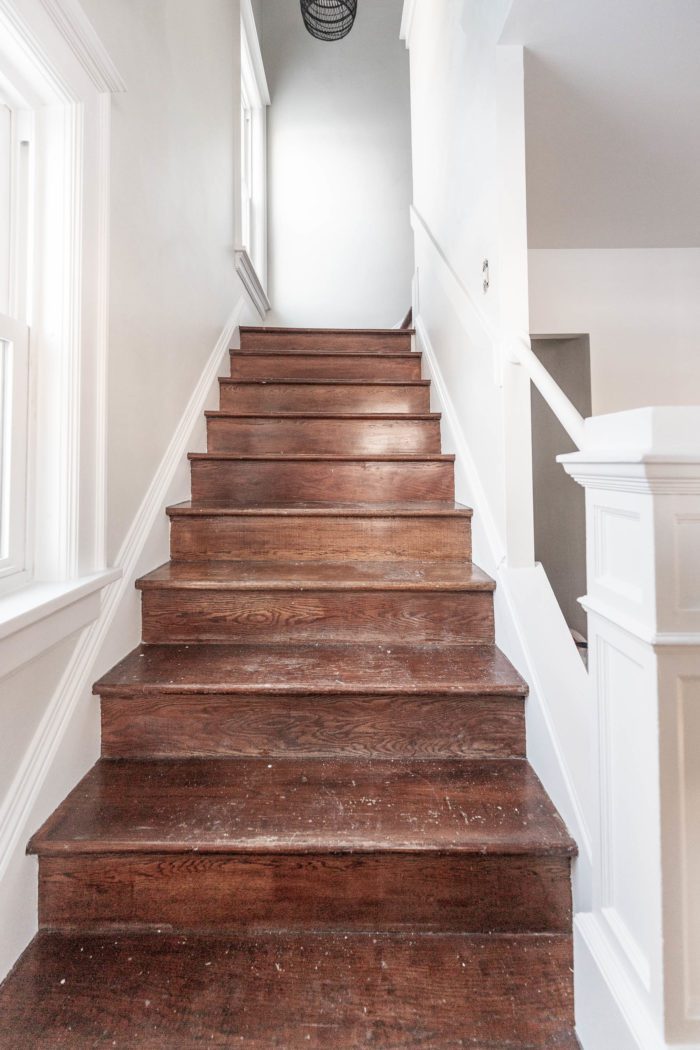
I did however do some pretty deep cleaning and scrubbing. I also had some paint splatter that I got off with a razor blade (very carefully). But really this step for me was just a whole lot of elbow grease!
Measure and Mark Center of Steps
Next I went down every single step and marked the center with some painter's tape. It's just nice to have this already in place when you go to start installing the pad. You'll also need to determine how you need to find center. A lot of stairs start off open, and end up with walls on both sides. If this is the case and some of your steps are different widths you have to determine what looks better. I have a newel post at the bottom and it affected the two bottom steps. I centered everything up on the majority of the top steps. But you'll have to evaluate how yours needs to be handled.
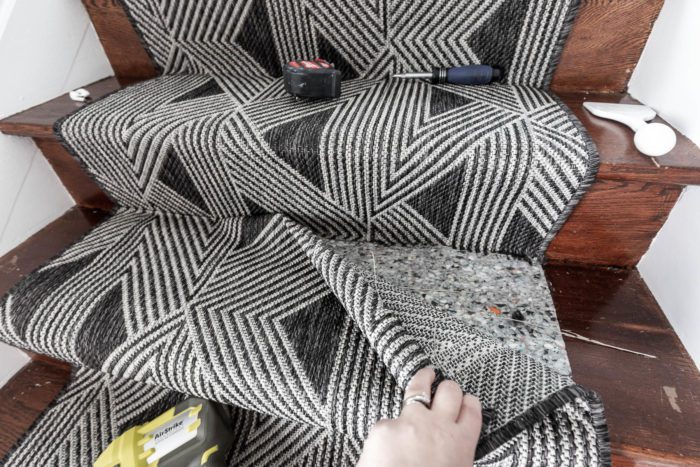
Measure and Cut Carpet Padding for Stairs
To measure and cut for the padding I first measured the width of my actual carpet runner. I wanted the padding to be about 2″ less wide than the rug (1″ on each side). This allows the rug to be stapled down and ensure there's no padding sticking out.
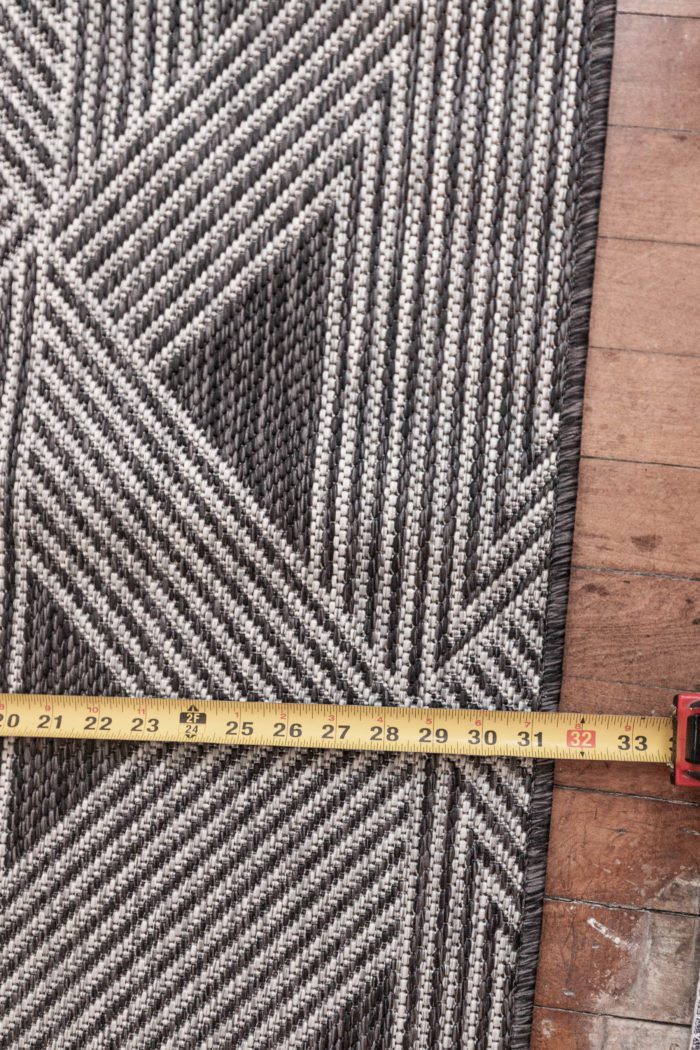
To measure for the depth of the pad I measured from the back to the front (right before the tread starts to round off). I subtracted 1/2″ to allow the carpet to sit nicely around the curve of the step. I also allowed about 1/8″-1/4″ on the back side of the padding so that it wasn't sitting all the way against the riser to allow the stapes to get the rug down nice and tight in the corner.
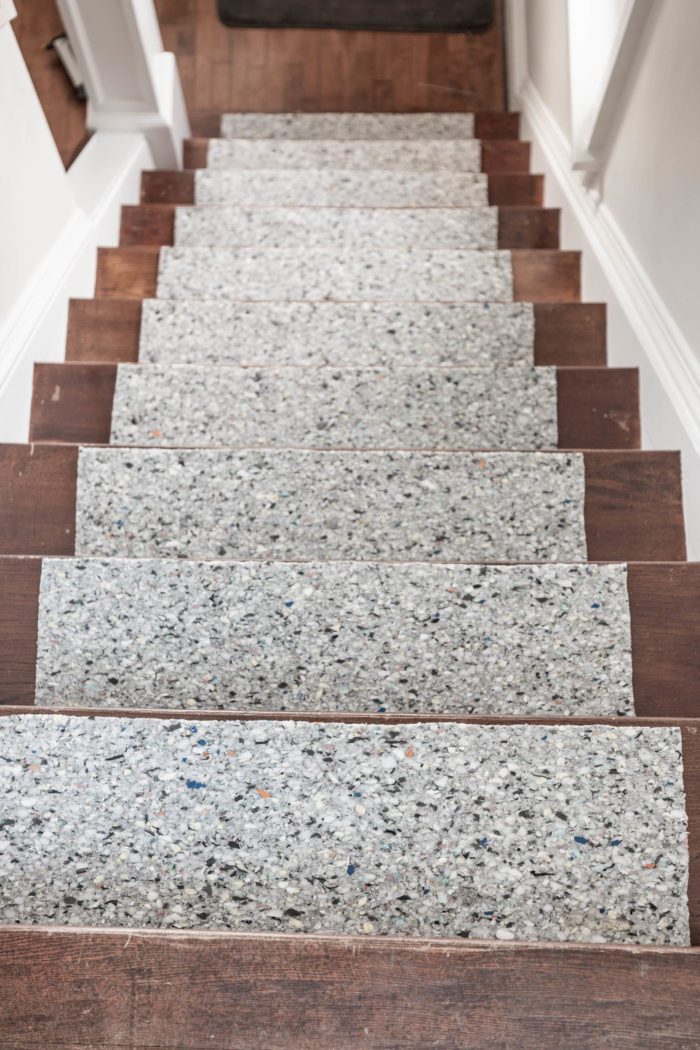
Once measurements have been determined cut those out of your carpet pad and begin centering them up and stapling them to the steps with the 1/2″ staples. Make sure you have the same distance on either side of the carpet pad to double check your center! Always staple from the middle out so that you don't end up with any bubbles.
Install Runner on Stairs
Installing the stair runner comes next. Starting at the top if your rig is like mine it has a nice folded edge that you can start with. I placed this under the lip of the floor (on the first riser) and begin stapling across the top. Again, starting in the middle and working my way out. I alternated sides as I moved out as well. Make sure you are starting off level, because you will be going straight down and if you start on an angle, the runner will slowly go to one side. You can see in the picture where I began.
*TIP: Before you begin stapling, use a sharpie to color the top edge of the staples black to blend in better with the rug!
Continue Installing Runner
Once you have that top edge stapled in place you will pull the runner out and use the carpet tucker to get it down into the corner as tight as you possible can. Start in the center and place one staple. Then continue using your carpet tucker to keep the rug taunt and even as you staple going out towards the edges. Make sure you are staying straight as you work your way down. You will want there to be the same amount of stair exposed on either side of the rug. Check this on EVERY single stair because it is easy to get off a little.
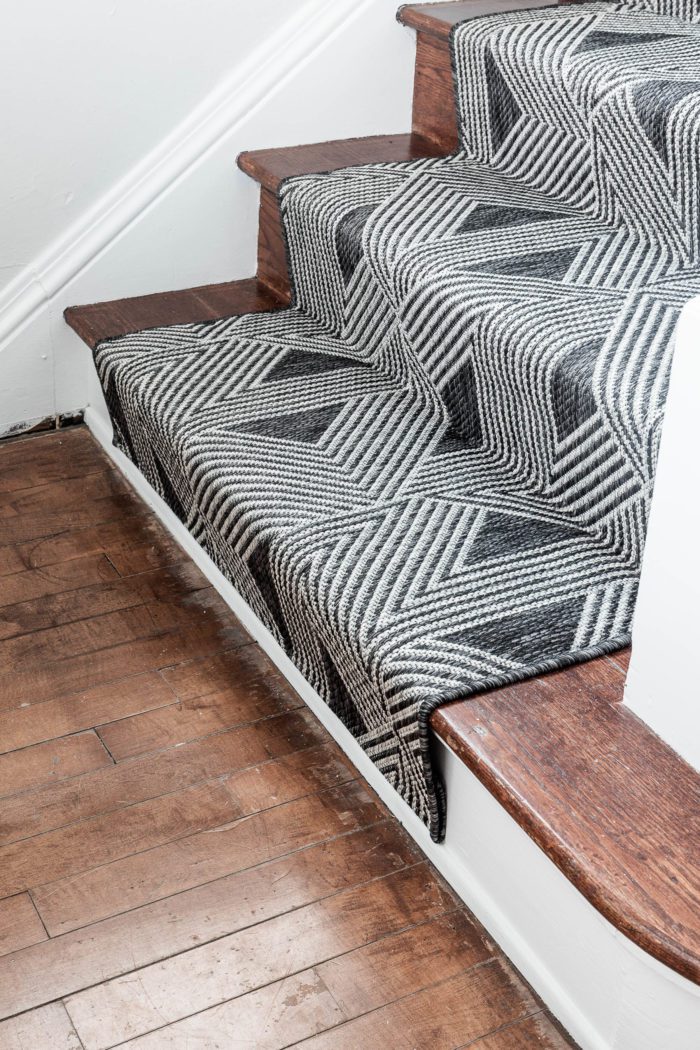
I chose to not wrap the rug around the lip of my steps, and just let it fall straight down into the crack. If you want to wrap it around the edge you would need to use the carpet tucker to pull it tight under that lip and staple along the bottom side. Make sure you are using the correct size staples for this and they don't come through the top!
Once you have stapled along the back corner to secure it, go back up to the step you just completed and staple along the finished edges of the rug to make sure the sides can't move around.
Joining Stair Runners
The biggest question I got when sharing this on IG Stories was can you join multiple rugs or does it need to be one long piece. You can definitely join runners. To do this I used the runner until I got to where I stapled it long the back corner of the riser. Then I cut off the excess. Then you will take a new runner, cut it off so that that pattern matches up, fold the unfinished edge under and staple along the back corner.
Ending the Runner
When you get to the end, just simply cut off the excess, fold it under and staple it along the top edge of your trim.
It's really quite a bit easier than I thought it would be to install a stair runner. It's literally just tucking the rug tightly and stapling.

Don't forget, I shared this process of how to install a stair runner on my IG stories, if watching the video is easier for you to understand. I saved it to my highlights so you can refer back if needed!
Looking for more projects? Check out our
DIY Project Gallery!
how to install stair runner
Source: https://cherishedbliss.com/how-to-install-a-stair-runner-diy/
Posted by: leefolong.blogspot.com
0 Response to "how to install stair runner"
Post a Comment